
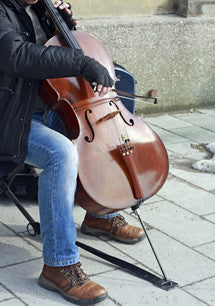

An instrument has many small parts that need to work together for it to function properly. Here are a few of the most common problems that you may be able to fix yourself.
Please never lose sight of two cardinal rules:
Never force anything- Instruments are very delicate and can easily be damaged
Never glue anything- You may damage the instrument by using the wrong glue or glue something that is not supposed to be glued
Instruments
Pegs- If pegs fit properly, they will turn smoothly without sticking and hold strings in tune at playing tension. Remove pegs individually and lubricate with Hill Peg Compound at the contact points. In winter, pegs slip when the pegs- made of denser tropical woods- react to dryness and shrink more quickly than the maple pegbox. To help strings stay in tune, wind the string so it is rubbing on the side of the pegbox. If your pegs suddenly start to slip after working well for a long time, and it happens to be winter, try pushing them in harder.
In summer pegs can be immobilized when the maple pegbox swells and locks the peg in. Forcing it can break the head right off. If a peg is stuck so tight you cannot move it, bring it in. If you are ever uneasy using more pressure to tighten or loosen a peg, ask your teacher for help or bring your instrument in.
Strings- Strings wear out long before they break and should be changed twice a year at least. Change strings one at a time to keep the bridge and soundpost in place. Lubricate the grooves on the nut and bridge with a pencil to reduce the chance of string breakage. If a strings breaks too soon, note where the break occurred as you may have a problem with the instrument.
Soundposts- The soundpost is the little wooden dowel standing up just behind the bridge foot, visible through the treble soundhole. It is held in place with pressure, not glue. If it falls you will hear a rattle inside your instrument. Setting the post back up is a job for a professional only.
Bridges- The bridge is the small maple piece that holds the strings off the top of the instrument. If it falls, please follow these steps:
1) Loosen the string tension and pad any loose parts to prevent further damage.
2) Check the instrument for cracks. If the top is cracked or the bridge is broken or warped, bring the instrument in for repair at once.
3) If the neck and/or fingerboard are loose, loosen the string tension and pad any loose parts to prevent further damage. Bring the instrument in for repair at once.
If the bridge has fallen over and everything else looks OK, you may attempt setting it back up yourself. Loosen the strings and line up the bridge with the f-hole notches. The strings should line up with the fingerboard. Tune the instrument making sure the bridge is not leaning forward or it will fall over again! The bridge should stand up straight, leaning back a little bit.
Cracks- Cracks in the top, back, sides, or neck mean you need to call us right away. Seams that open where the instrument sides meet the top or back act as a safety valve to prevent dryness cracks. They are not serious if glued promptly by a professional. Instruments with open seams can still be played, but they will loose a great deal of tone and may buzz.
Neck and Fingerboard- if the neck comes out of the body or the fingerboard comes off, loosen the strings completely at once to prevent more serious damage. Pad the body of instrument to prevent any scratches from loose parts. Fixing this is a job for a professional only.
Buzzes- Fixing a pesky buzz is a sure sign of an expert luthier. If you can find something small piece rattling because it needs to be tightened, e.g. the fine tuners, you may be able to fix it yourself.
Tailgut- The tailgut is the cord that keeps the tailpiece attached to the instrument. Sometimes they break, loosening the strings and causing the bridge to fall over. It looks bad but is usually not a serious problem and can be easily repaired.
Fine Tuner- Fine tuners attach to the tailpiece and make tuning easier. If they do not turn easily, try a drop of thin oil. It that does not help, you need a new one. They are inexpensive and can be easily replaced.
Bows
Stick- The bow stick holds the hair at one end and allows it to be tightened at the other. It can be made of different tropical hardwoods, the most common being Brazilwood, or Pernambuco. Recently Carbon Fiber bows have become very popular for their durability.
Frog- The piece that sits on the stick holding the hair. The frog slides to allow the hair to be tensioned. It is usually made of ebony with metal trim. The frog is connected to the button by the adjuster screw, which is hidden inside the stick.
Adjuster- The tightness of the hair is regulated by a screw that runs through the center of the stick. If the hair won’t tighten to playing tension easily, do not force it; you will damage the bow. Take it to a professional.
Button- The small stub at the end of the stick that you turn to tighten the hair. The button connects to the frog by the adjuster screw and nut. If it does not turn easily, to loosen or tighten, do not force it; you will cause serious damage!
Hair- The hair on your bow is a natural product, the actual hair of a horse’s tail. When new hair is put into the bow, it is fitted to a precise length then rubbed with rosin to make it grip the strings. After about 6 months of use the hair gets dirty and slips when you try to play. It also stretches, making the precise ribbon of hair the bowmaker inserted into the bow lose its playability. This is just one of the many reasons washing the hair in a bow is not a good idea. Get your bow rehaired at least twice a year.
Proper hair length- While this is not something you can adjust, it is very important and useful to understand. If your bow has been properly rehaired, you should be able to tighten the hair to playing tension with 3 or 4 turns of the button. Bow hair stretches and gets longer over time and eventually will be too long to use. Hair that is too long makes a bow play badly by changing its balance and feel in the player’s hand. Believe it or not, clients come to the shop convinced they need a new bow because their old bow no longer plays well and we have the pleasing job to inform them a proper rehair is all they need.
Here’s an easy test: loosen the frog until it moves forward as far as it will go and hold the bow horizontal with the hair towards the ceiling. If the hair is drooping below the stick you are ready for a rehair. If you cannot tighten your bow to playing tension easily, do not ever force it.
Head Wedge & Spreader Wedge- The hair is held in place at the head and the frog by precision fitted wooden plugs. Sometimes these come loose and the hair falls out of the head or the ribbon of hair is too narrow at the frog. This is a job for an expert.
Breaking Hairs- Hairs break naturally from being played. If you are breaking a lot of hairs while playing, come in at once with your instrument and bow – there are many possible causes which we can assess immediately.
If you open you case and suddenly find many broken hairs, most likely the bow hair bug is in your case. If enough hairs are left intact for you to use the bow, vacuum out the case, and put it out into the sunlight wide open for an afternoon. Later wrap a mothball in a tissue and put it into a case pocket but don’t let it touch the instrument. If the mothball is left in contact with the instrument it will damage the varnish! Keep the case shut for a few days and you should be OK. Do this before you come for a rehair! In rare cases you may need to use a stronger insecticide or repeat the process several times.
If you are unable to resolve any problems, or if they persist, bring your instrument and bow to a professional. Contact us if you are far from home and need a referral to a reputable shop.
Leave a comment